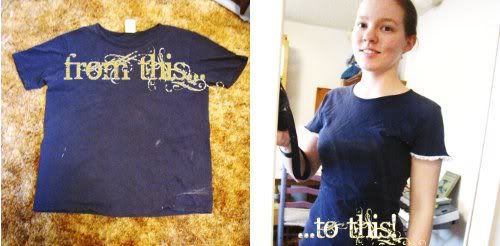
Please understand that I am just a DIY wanna-be. If there are ways I can improve this incredibly simple tutorial, I would love to hear them!
So, here it is!

My attempt turned out a little smaller than I expected, so make sure you give yourself a little extra room!

1. Figure out where you want the narrowest point of your shirt to be and place a pin there. Cut in a large, shallow curve, leaving 5/8" seam allowance.

2. Lay one sleeve flat and trim it slightly it in a curve to create a cap sleeve. Sort of.

3. If you want, re-sew the shoulder seam. I did mine with a 5/8" seam allowance, and it did what I wanted it to.

4. Trim the seam, and use a zig-zag stitch to lock the edges.

5. Turn the edge of the sleeve under, and pin a lace or trim of your choice to the turned edge. Sew.
6. Sew shirt sides. Trim. Zig-zag stitch to lock edges.

7. Enjoy!

Very nice, You have so much talent.
ReplyDeleteThis is really neat! Thanks!
ReplyDelete(good job on the tutorial too)
Jess
Wow, I am totally going to try that. Thanks for posting the tutorial on how to do it.
ReplyDelete